Introduction to Windows Defender Offline ISO File
Windows Defender Offline is a tool from Microsoft that helps you to remove persistent malware or viruses from your computer by scanning your system outside of the Windows environment. It is a powerful utility designed to run before your computer starts, ensuring that malware that could affect the operating system is removed. This guide provides a step-by-step process to download and create a bootable Windows Defender Offline ISO file.
Step 1: Open Your Browser
- Launch Your Browser: Open your preferred web browser (Chrome, Edge, Firefox, etc.).
- Search for Windows Defender Offline: In the browser’s search bar, type “Windows Defender Offline ISO file download” and hit enter. This will lead you to Microsoft’s official page or trusted third-party sites where you can get the ISO file.
Step 2: Visit Microsoft’s Official Website
- Go to Microsoft’s Official Page: Click on the link to the official Microsoft website that offers the Windows Defender Offline ISO. It is important to download software from trusted sources to ensure safety and reliability.
- Locate the Download Section: On Microsoft’s page, find the download section specifically for Windows Defender Offline. Ensure that you are getting the latest version for better protection and performance.
Step 3: Download the Windows Defender Offline ISO
- Click the Download Link: Once you've located the download button, click on it. The download will begin immediately.
- Save the ISO File: When prompted, choose a location to save the Windows Defender Offline ISO file. Typically, the "Downloads" folder is a safe and convenient location.
Step 4: Prepare a USB Drive
- Insert a USB Flash Drive: To create a bootable disk, you will need a USB flash drive with at least 1 GB of free space.
- Format the USB Drive: Before using it for this purpose, it’s a good idea to format the USB drive. To do this:
- Right-click on the USB drive in “File Explorer.”
- Select “Format” from the context menu.
- Choose the file system as “FAT32” or “NTFS.”
- Click “Start” to format the drive.
Step 5: Create a Bootable USB Drive
- Use a Tool like Rufus: To create a bootable USB drive, you’ll need a tool like Rufus, which is free and easy to use.
- Download Rufus: Go to the official Rufus website and download the latest version of the software.
- Run Rufus: After installing Rufus, open it and follow these steps:
- Select your USB device from the dropdown list.
- Click on the "Select" button and browse to locate the Windows Defender Offline ISO file you downloaded.
- Ensure that the "Partition scheme" is set to “MBR” and the "File system" to “FAT32.”
- Click “Start” to begin creating the bootable USB drive.
- Wait for Completion: The process will take a few minutes, depending on the speed of your USB drive and computer.
Step 6: Boot From the USB Drive
- Restart Your Computer: After the bootable USB is ready, restart your computer.
- Enter BIOS/UEFI: On restart, enter your computer’s BIOS/UEFI settings by pressing a specific key (often F2, F12, ESC, or DEL) during the boot-up process.
- Set USB as the Primary Boot Device: In the BIOS/UEFI settings, navigate to the Boot menu and set the USB flash drive as the primary boot device.
- Save and Exit: After making changes, save the settings and exit the BIOS/UEFI. Your computer will now boot from the USB drive.
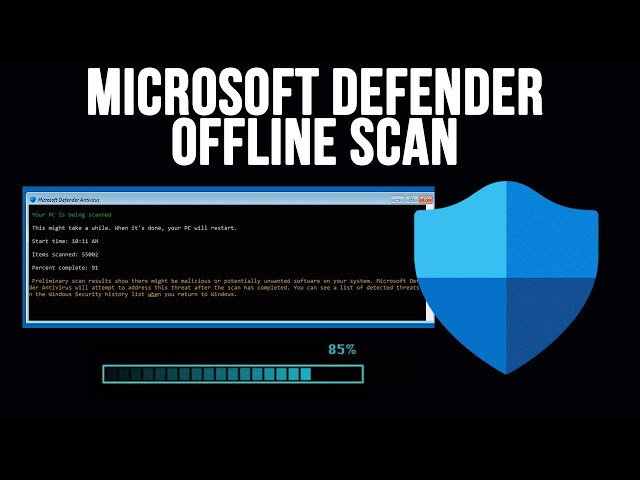
Step 7: Run Windows Defender Offline
- Start the Scan: After your computer boots into Windows Defender Offline, it will automatically begin scanning for malware or viruses on your system.
- Wait for the Scan to Complete: The tool will perform a thorough scan of your system for any malicious files. Depending on your system’s speed and the amount of data, this process may take some time.
- Review the Results: Once the scan is complete, Windows Defender Offline will show you any detected threats and provide options to quarantine or delete the identified malware.
Step 8: Remove Detected Malware
- Quarantine or Delete: Based on the scan results, Windows Defender Offline will give you the option to quarantine or remove the malicious files. Quarantining will isolate them, while deletion will completely remove them from your system.
- Confirm Your Actions: Review the detected items carefully before choosing to delete them. If unsure, choose to quarantine them for further review after the scan completes.
Step 9: Restart Your Computer
- Complete the Process: After dealing with the malware, restart your computer.
- Remove the USB Drive: When the system restarts, remove the USB drive to avoid booting into Windows Defender Offline again.
Step 10: Perform a Full System Scan (Optional)
- Run a Full Scan in Windows: Once your system has restarted, you may want to run a full scan within Windows to ensure no residual malware remains.
- Enable Windows Defender Real-Time Protection: Make sure that Windows Defender’s real-time protection is enabled, so it can continue to protect your system from future threats.
Step 11: Update and Maintain Your System
- Keep Your Software Updated: To maintain security, ensure that your operating system, antivirus software, and other applications are regularly updated with the latest patches and definitions.
- Regular Scans: Run routine scans with Windows Defender to ensure your system stays clean and free from malware.
Step 12: Troubleshooting
- If the Scan Didn’t Detect Anything: If no malware is found, but you’re still experiencing issues, you may need to try other security tools or reset your system to factory settings.
- Unable to Boot from USB: If your computer doesn’t boot from the USB, double-check the BIOS/UEFI settings to ensure the boot priority is set correctly.
- Incompatibility with Hardware: Ensure that your hardware is compatible with Windows Defender Offline. Some older systems may encounter issues with booting from USB drives.
Step 13: Uninstall Windows Defender Offline (Optional)
- Delete the Bootable USB: If you no longer need the USB drive, you can delete the bootable partition and format it to use as a regular storage device.
- Remove the ISO File: You can also delete the Windows Defender Offline ISO file from your computer if it’s no longer needed.
Conclusion
The Windows Defender Offline tool is an essential security utility for removing stubborn malware and viruses that cannot be removed while the operating system is running. By following the steps outlined above, you can easily download the ISO file, create a bootable USB, and perform a scan to keep your system secure. Regular use of this tool, along with up-to-date software and real-time protection, will help safeguard your system from future threats. Always make sure to download the tool from trusted sources, and maintain an active security protocol for optimal performance