Free Download WordPress Porto Template
The WordPress Porto template is a highly customizable, multipurpose theme designed for building professional websites with ease. It combines modern design aesthetics, functionality, and high performance, making it ideal for businesses, blogs, eCommerce sites, and portfolios.
Introduction to WordPress Porto Template
The WordPress Porto template is a highly customizable, multipurpose theme designed for building professional websites with ease. It combines modern design aesthetics, functionality, and high performance, making it ideal for businesses, blogs, eCommerce sites, and portfolios.
Outcome: Step-by-Step Guide to Using the WordPress Porto Template
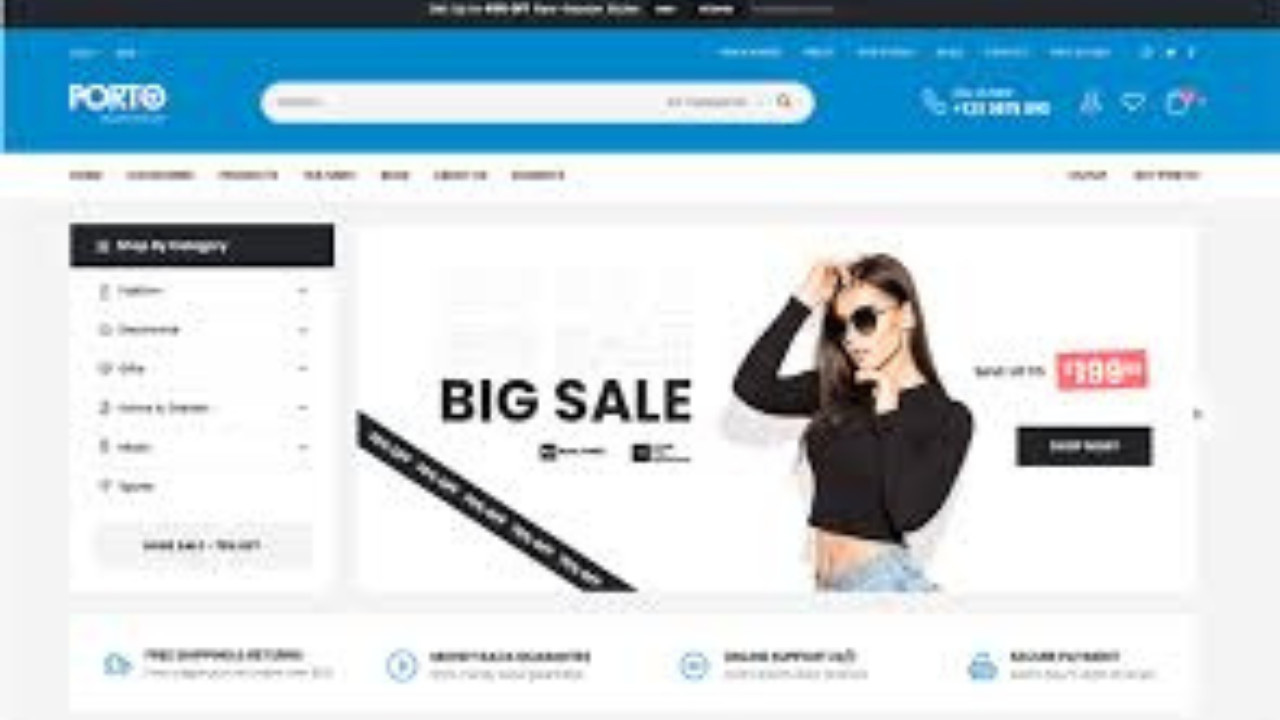
Understanding the Porto Theme
What is Porto?
Porto is a versatile WordPress theme known for its responsive design and user-friendly interface. It's packed with various demo content and customization options, allowing users to create virtually any type of website—whether it's for an online store, a corporate site, or a personal portfolio.Key Features:
- Mobile-first responsive design
- Demo content imports to speed up setup
- Drag-and-drop page builder integration (WPBakery or Elementor)
- Built-in eCommerce support for WooCommerce
- Multiple pre-built layouts and skins for different website niches
Installing the Porto Theme
- Step 1: Purchase the Porto Theme
- First, go to a marketplace like ThemeForest to purchase the Porto theme. Once purchased, download the theme zip file.
- Step 2: Install the Theme via WordPress Dashboard
- Log into your WordPress dashboard.
- Navigate to
Appearance>Themes>Add New>Upload Theme. - Choose the downloaded zip file and click "Install Now."
- Activate the theme after installation.
- Step 1: Purchase the Porto Theme
Setting Up Demo Content
- Step 1: Install Required Plugins
- Porto requires several plugins for optimal performance, including the WPBakery page builder or Elementor, WooCommerce, and Porto Core. Install and activate these plugins.
- Step 2: Import Demo Data
- After activating the theme and necessary plugins, you can import demo content to quickly set up your site. Navigate to
Porto>Demo Importin the WordPress dashboard and choose a demo that closely matches your desired layout. - Import the demo content with a single click. It will populate your website with pages, posts, images, and sample settings.
- After activating the theme and necessary plugins, you can import demo content to quickly set up your site. Navigate to
- Step 1: Install Required Plugins
Customizing the Porto Theme
- Step 1: General Theme Settings
- Under
Appearance>Customize, you’ll find options to modify various aspects of your site’s appearance, such as logo, header, typography, colors, and more.
- Under
- Step 2: Create Custom Pages Using Page Builders
- The Porto theme supports popular page builders like Elementor and WPBakery. You can start creating custom pages by selecting either of these builders, dragging and dropping elements into place.
- Add custom sections like hero images, service features, client testimonials, and call-to-action buttons using the builder’s interface.
- Step 1: General Theme Settings
Setting Up Navigation
- Step 1: Create Custom Menus
- Porto allows you to set up custom menus easily through
Appearance>Menus. Here, you can add different pages, categories, and custom links to create a smooth navigation experience for users.
- Porto allows you to set up custom menus easily through
- Step 2: Customize Header and Footer
- Customize the header and footer of your site under the
Porto>Theme Optionsmenu. Porto provides different header styles, including full-width, boxed, and sticky headers. Select the one that fits your website’s style.
- Customize the header and footer of your site under the
- Step 3: Set Up Mega Menu (Optional)
- For larger sites, Porto offers a Mega Menu feature to display a large number of categories or pages in an organized way. Activate this feature under the menu settings for a more complex structure.
- Step 1: Create Custom Menus
Configuring eCommerce Features
- Step 1: Setting Up WooCommerce
- If you're planning to create an online store, Porto integrates smoothly with WooCommerce. Install and activate the WooCommerce plugin, and then follow the guided setup for configuring product pages, payment gateways, and shipping options.
- Step 2: Customize Product Pages
- Use Porto's built-in WooCommerce layouts to design product pages. You can select the layout type, grid settings, and product details display for an enhanced shopping experience.
- Step 1: Setting Up WooCommerce
Optimizing Your Website
- Step 1: Mobile Optimization
- Porto is built with mobile responsiveness in mind, but it’s essential to check how your site appears on mobile devices. Use the customizer’s mobile preview and tweak elements as needed to ensure your site looks great on all screen sizes.
- Step 2: Speed Optimization
- Porto is designed for high performance. To ensure optimal speed, enable caching with plugins like WP Rocket or W3 Total Cache. Also, consider compressing images using a tool like Smush for faster loading times.
- Step 3: SEO Settings
- Porto comes with built-in SEO optimization features. You can improve your site's search engine visibility by configuring SEO settings in the WordPress customizer or by using an SEO plugin like Yoast SEO.
- Step 1: Mobile Optimization
Adding Custom Functionality
- Step 1: Porto Widgets
- Porto comes with a variety of custom widgets to enhance your site, including Instagram feeds, contact forms, social media buttons, and recent posts. Add these widgets to your pages using the WordPress widget area.
- Step 2: Advanced Customization with CSS
- For more advanced users, Porto allows you to add custom CSS under
Appearance>Customize>Additional CSSto fine-tune the design.
- For more advanced users, Porto allows you to add custom CSS under
- Step 1: Porto Widgets
Regular Updates and Maintenance
- Step 1: Theme and Plugin Updates
- Keep the Porto theme and all associated plugins up to date to ensure compatibility with the latest version of WordPress and to avoid security vulnerabilities.
- Step 2: Backups
- Regularly back up your site using plugins like UpdraftPlus to ensure that your data is safe in case of any issues.
- Step 1: Theme and Plugin Updates
Troubleshooting and Support
- Step 1: Porto Support
- If you encounter any issues, Porto provides a dedicated support team. You can access support by visiting the theme’s support page on ThemeForest or Porto's official website.
- Step 2: Community Forums
- Porto also has an active community where users share tips, tricks, and solutions to common issues. Join the Porto community forums or the official Facebook group for ongoing assistance.
Conclusion
The WordPress Porto template provides a solid foundation for building a variety of websites. With its flexible design, ease of use, and extensive customization options, Porto stands out as one of the best multipurpose themes available. Whether you're creating a simple blog or a complex eCommerce store, Porto's features and user-friendly interface ensure that your website is both professional and functional. By following the steps outlined above, even beginners can create a fully customized website without needing advanced coding knowledge.